IRender nXt Tutorial - Post Processing Renderings
Post processing renderings of SketchUp models can be accomplished in a variety of ways. IRender nXt includes features that permit adjustments to renderings:
- While the rendering is in progress
- Immediately after a rendering is finished
- After opening a saved .nxtImage file
In other words, it's not necessary to take your rendering to another application, post processing methods are included in the software.
Contents
Adjustments and Filters
Open the Adjustments and Filters dialog


Adjustments
1. Brightness - Brighten or darken the entire rendering
These images illustrate changes to rendering brightness: 50 (default), 60, and 40

2. Contrast - Increase or decrease the variation between bright and dark tones in the rendering
These images illustrate Contrast values: 50 (default), 60, and 40
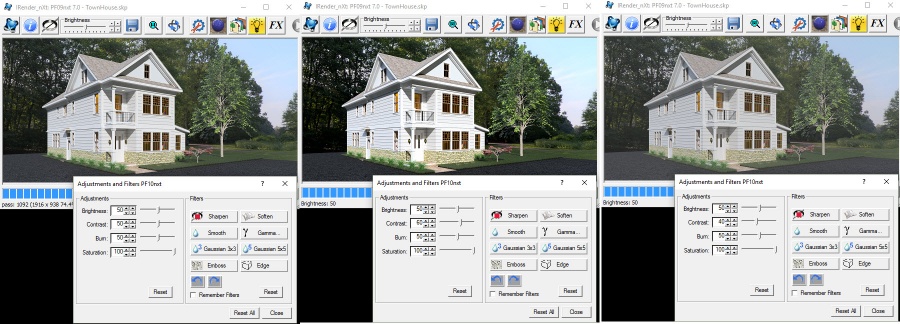
3. Burn - Increase white balance of the image
These images illustrate Burn values: 50 (default), 70, and 20
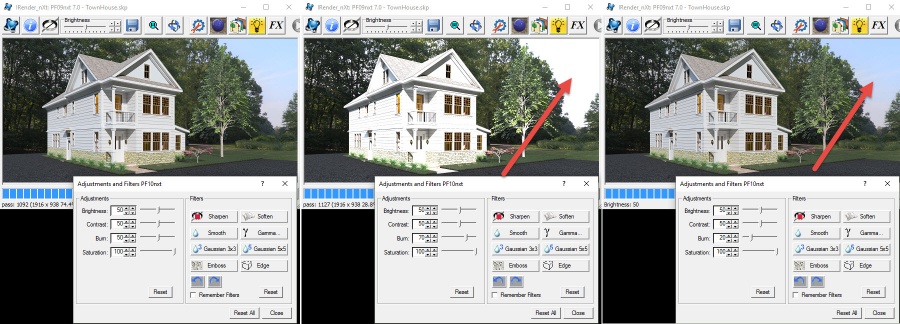
4. Saturation - Increase or decrease color intensity
These images illustrate Saturation values: 100 (default), 50, and 0
Filters
- Sharpen - Emphasizes (highlights) edges
- Smooth - Reduces edge intensity, flattening the image
- Gaussian - Reduces image noise/pixelation and detail
- Emboss - Produces a 3D (monochromatic) shadowed image
- Soften - Reduces image noise/pixelation
- Gamma - Image luminance (brightness) correction
- Gaussian 5x5 - Reduces noise and detail using a 5x5 pixel grid across the image
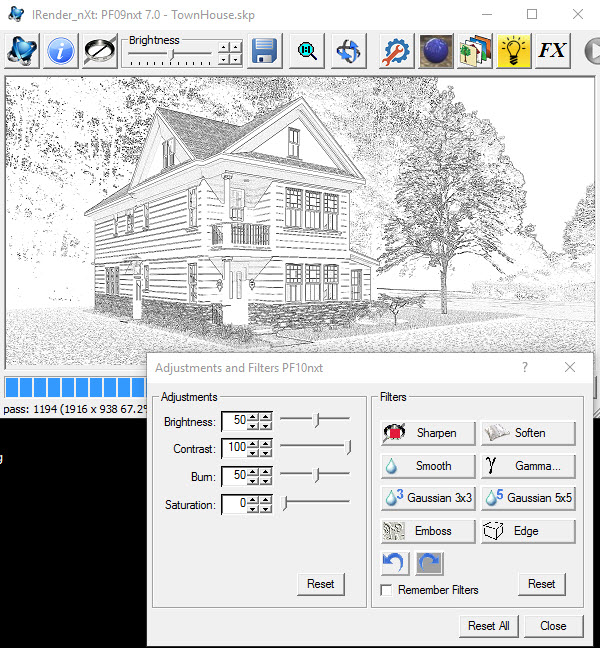
- Edge - Reduce the rendered image to edge lines
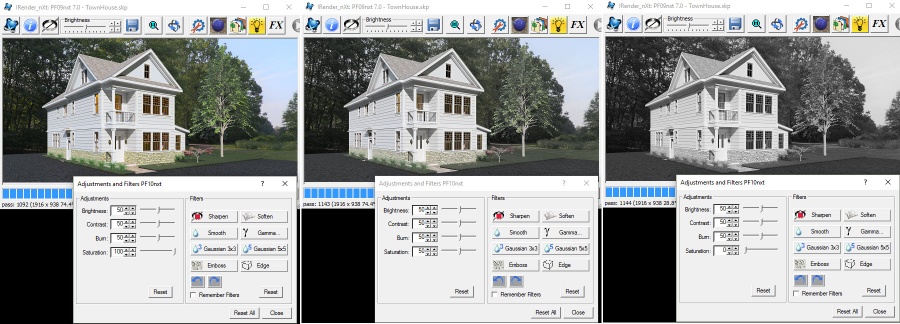
Emboss and Edge filters in particular can produce interesting rendering options.
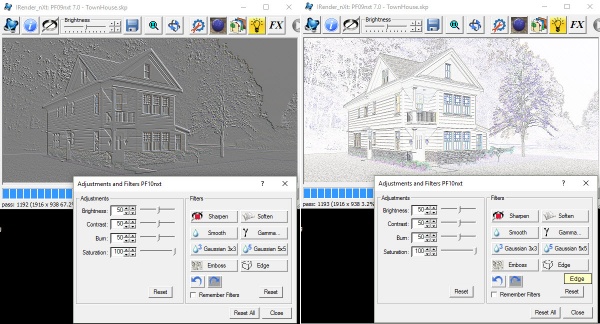
The following image combines the Edge filter, Saturation set to 0, and Contrast set to 100.
Light Balancer
Natural and artificial lighting can be balanced at any time: while the rendering is processing; immediately after the rendering is completed; when a .nxtImage file is opened.
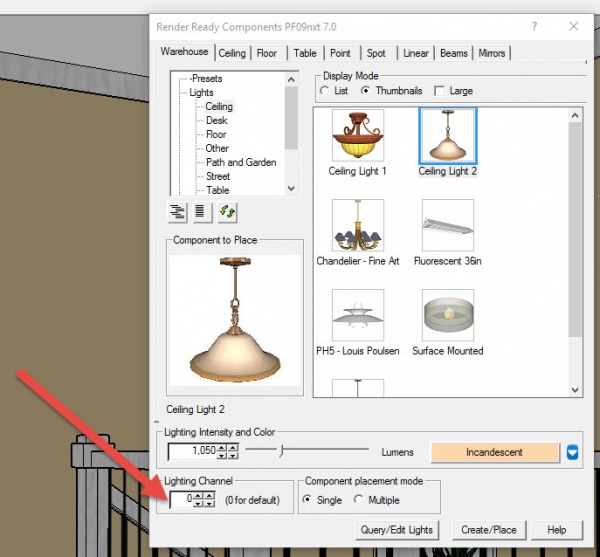
Light Channels
IRender nXt provides 8 distinct light channels that can be used to balance natural and artificial light sources. The light channel is set automatically for artificial lighting when the channel is set to 0 during placement. Specify a light channel while placing fixtures to facilitate balancing.
Balancing Lighting
Each of the 8 light channels can be switched on/off, and can also be brightened or dimmed to achieve the appropriate lighting for the project. Additionally, light channels can be used to modify the rendered scene, for example, from a bright daylight rendering to dusk.
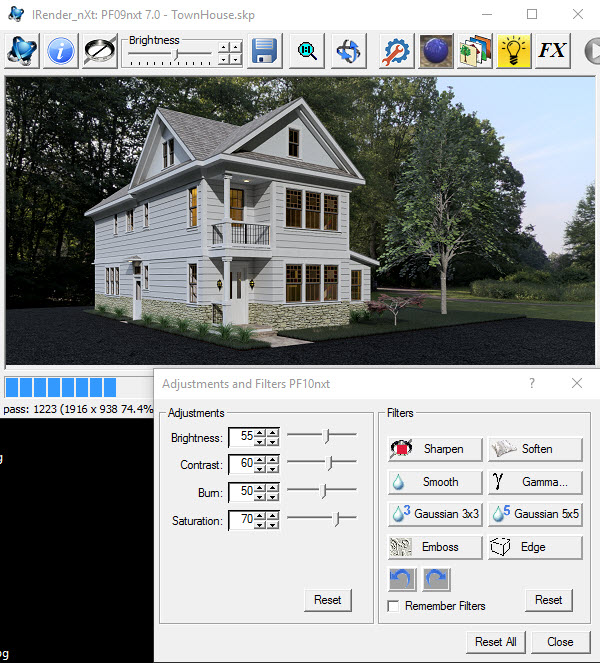
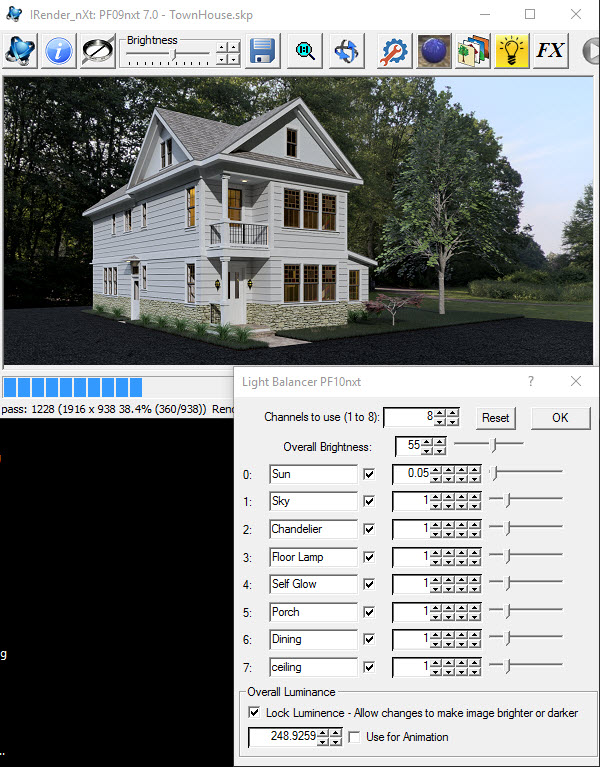
Bright Daylight to Dusk
Creating a dusk image from a daylight image can be accomplished with the Light Balancer dialog. To start I used the Adjustments and Filters dialog, setting Brightness to 55 (slightly brighter), Contrast to 60 (more contrast), and Saturation to 70 (lower color intensity).
Display the Light Balancer Dialog when you click this toolbar icon:

The sun is set to .05 to reduce the overall luminance of the rendering while still showing sun shadows.
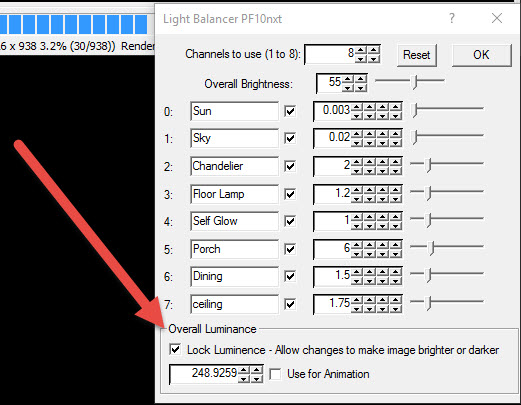
The Dusk image is achieved with these adjustments:
0. Sun = .003
1. Sky = .02
2. Chandelier = 2
3. Floor Lamp = 1.2
4. Self Glow = 1
5. Porch = 6
6. Dining = 1.5
7. ceiling = 1.75

A note on Overall Luminance
The luminance, or brightness of the rendering is calculated during processing.
To retain the image brightness even while you adjust each light channel, uncheck this box. Although the lighting assigned to the channel you're adjusting will change, the overall brightness of the rendering will remain constant.
When Lock Luminance... is checked, manipulating lighting channels will brighten or dim the image accordingly.
Effects (FX)
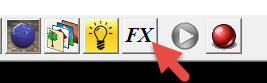
Unlike Adjustments and Filters and Light Balancer, which can be used while a rendering is processing, Image Effects can only be applied to completed renderings. Start Image Effects when you click the render window toolbar icon.
- Haze - Add a haze overlay to the image.
- Glare - Add lighting glare
- Depth Blur - Manage depth of field for the image
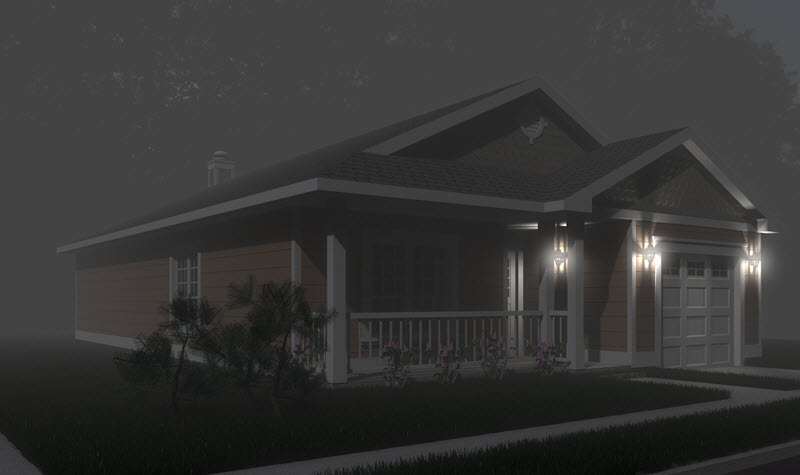
The original rendering, before Haze and Glare effects:

The same rendering after the addition of Haze and Glare effects: