
“It (IRender nXt) is an amazingly fast tool that produces great images and I highly recommend it.”
All the features you need for great renderings:
- Lights and illumination
- Reflective materials
- Background images
- Realistic glass materials
- Top quality, photorealistic ray-tracing rendering engine
- Fully integrated into SketchUp/Mozaik
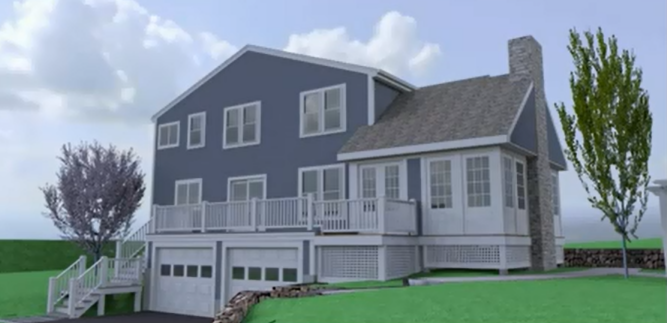
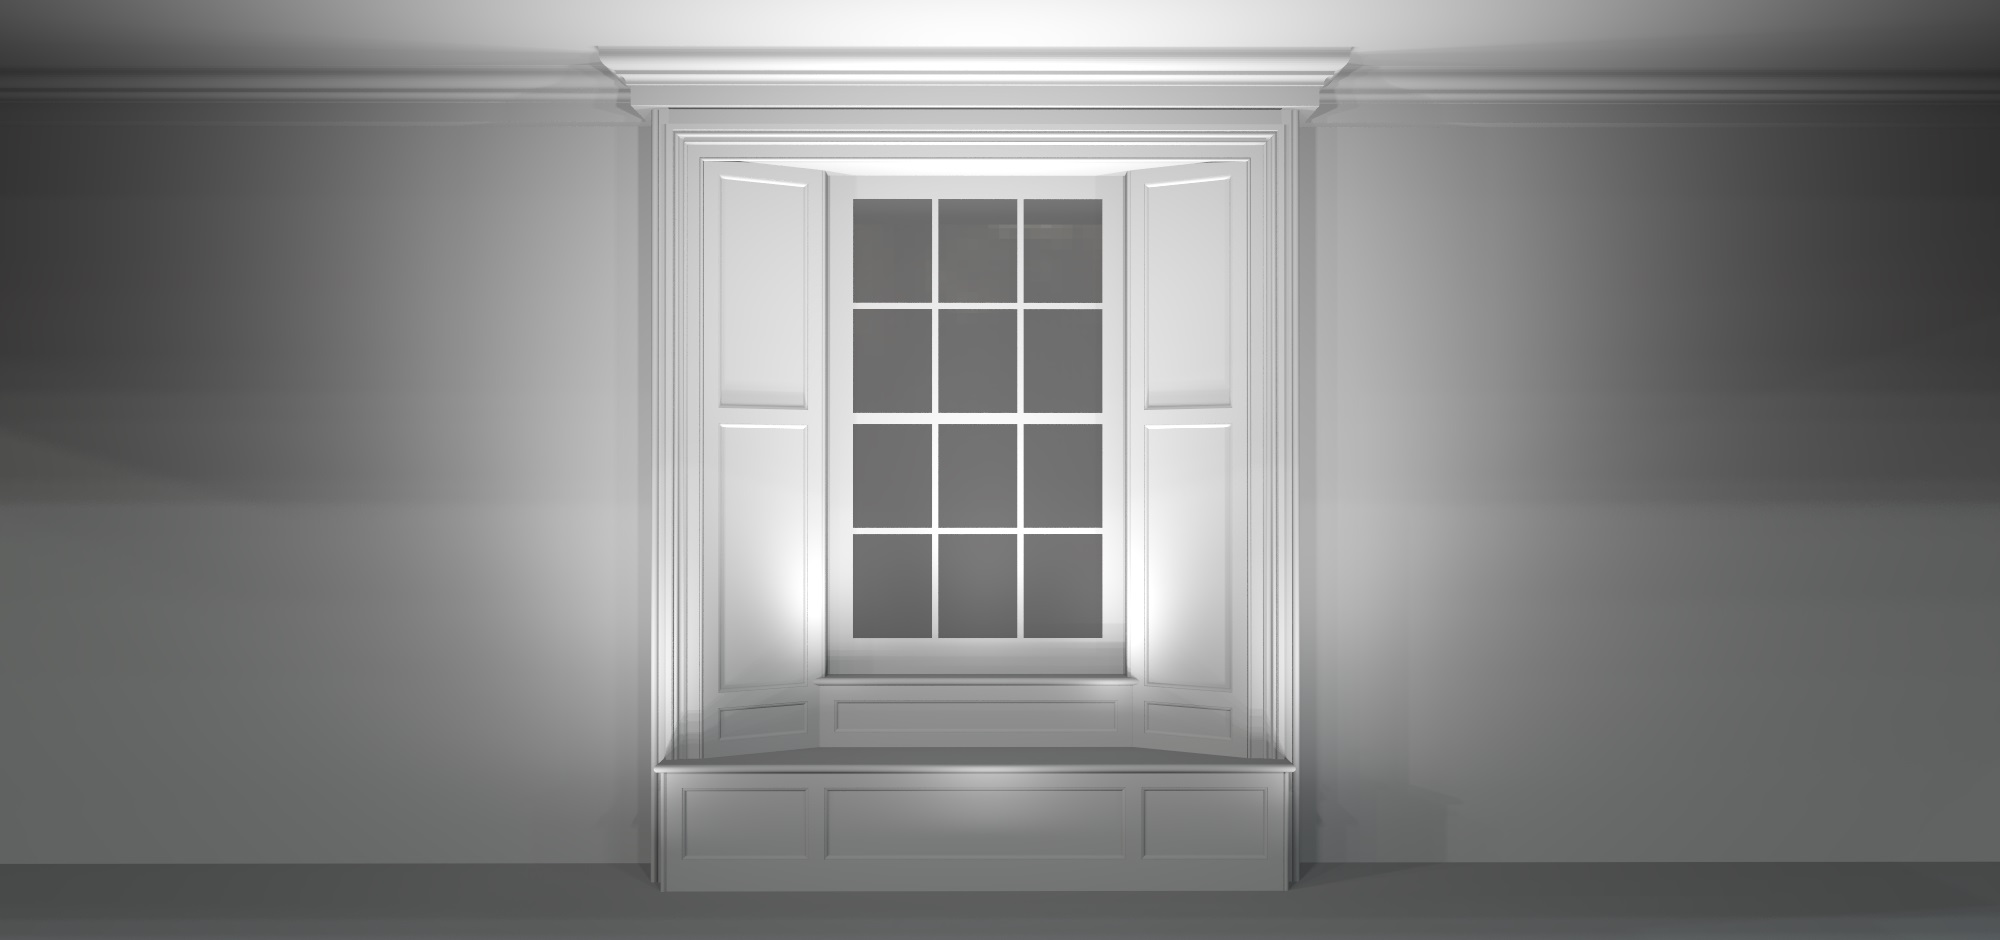
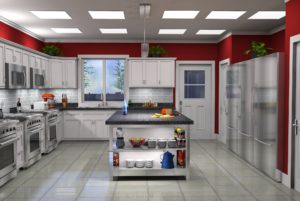
Perspective view of a SketchUp model rendered with ArielVision
By offering just the options and settings you need, ArielVision makes it easy to learn to render
- Lighting defaults are preset for you
- Material settings provide just what you need
- Predefined materials make it even easier
ArielVision uses sun, sky, shadows, lights, transparency and reflections to create photorealistic renderings from SketchUp and/or Mozaik models at an affordable price.
ArielVision uses a simple dialog to set properties on SketchUp or Mozaik materials, such as reflections, and has a Wizard to create many common lights. Great renderings can be created with a single button click and no changes to the model at all.
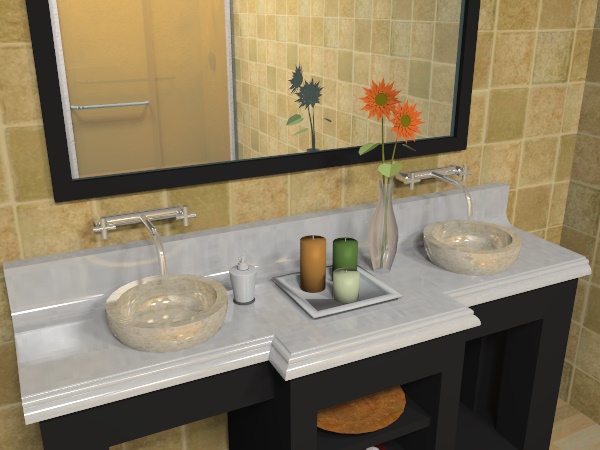
This interior scene was created by downloading a vanity, mirror and shower stall from the SketchUp 3D Warehouse, right clicking on materials to set reflection and placing ceiling lights in the ceiling. This rendering took less than 1 minute to complete.
“”
“SpaceDesign saves us a huge amount of time in setting up our products to manufacture and virtually eliminates errors altogether. If it is in your model you can create it and cost and manufacture it!”
“What a great program. Fantastic rendering results. looking forward to getting on board with this for exterior reno work”
“The ability to use different light sources and types of lighting is perfect.”
“I find it easy to apply what I need to get the level of photorealism I want, and the results are spectacular.”
“Offering photorealistic renders allows a visual like no other.”
“We needed a means of extracting and formatting attribute data from our models to import directly into our ERP system. SpaceDesign was excellent for this…” Ken, New Zealand“
“…and love, love, your program (nXtRender for AutoCAD) – am very happy that I have upgraded.”
“..why didn’t I see this before? Sigh… Just bought the new Vray, which is giving me endless trouble. Because I can t(yet?) render with that, I downloaded the iRender demo. It’s excellent! Beautiful results, absolutely on a par with Vray; far more intuitive interface; and some nice environment options too. It renders a big model that makes Vray crash without a glitch, and pretty fast at that. So much for impulse buying. I’m seriously considering getting this anyway.”
“I fully expected to consign IRender to the deeper recesses of my ‘C’ drive. What I did not expect, was the level of enthusiasm I have come away with from this first project. I now want to learn all I can about SU and IR. I have produced a reasonable render for my client. Yes there are things I have done which I am not sure how they worked out as they have and will probably not work the same way with my next model.
It has been a long time since I downloaded a piece of software which not only worked out of the box, but filled me with an enthusiasm, which has been missing for a long time.”
“Once again thanks for your quick response. Your product is starting to really turn heads in our office as we use it more.”
“It doesn’t hurt that it’s very affordable!”
“Thank you very much for your help, I really appreciate it and I am impressed with your company service.”
“IRender nXt is much more intuitive and has the unique benefit of light channels which is what allows me to capture all the different light ambiances in one render job, the other engines do not have this amazing feature. Also, the guys at Render Plus are brilliantly helpful and rapid in response.”
“I was thrilled to find this program (IRender nXt) that I found affordable as well as easy to learn how to use.”
“The ability to adjust the light levels for the different channels in real time makes adjusting a rendering easy.”
“I’m teaching this stuff and can barely keep up with the students sometimes so my learning curve has to be accelerated sometimes.”
“I bought a license of one year through my professional high school, it works very well.”
“First response was faster than I had hoped. And you identified and resolved the issue even faster.”
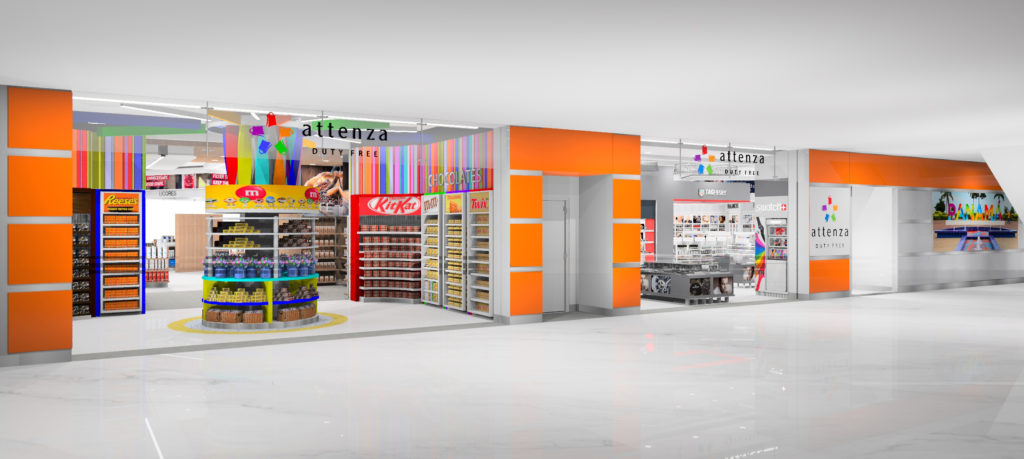
“(IRender nXt Cloud Rendering Service) We are now able to run a complete set of new renders before build, once the client has provided us with the final artwork and graphics, which was not always possible to timeframes before having to go to site and receiving final artwork.”
Fully Integrated into SketchUp/Mozaik
All renderings settings – reflection, lights, etc. – are stored in your SketchUp/Mozaik model and the rendering is started with a single click on the ArielVision toolbar. You can return to the model and re-render it without having to define materials and lights or make other renderings settings – everything is remembered and stored in the model.
How it works
ArielVision gets its rendering information from SketchUp/Mozaik materials. Colors, transparency and textures are set normally in SketchUp/Mozaik and used for rendering. Reflection and Glow settings are assigned to materials by right clicking on any surface which already contains the material, and setting the properties (you do not have to drill into groups and components. ArielVision will automatically find the proper material for you).
ArielVision can render the scene using as many rendering passes as desired. Rendering passes use additional lighting samples from the sun, sky, and lights to make smoother shadows and more realistic effects. The default setting is 20 passes, but you can increase the number as desired.
You can render at any resolution or render quality desired. Higher resolutions (higher render quality) takes more time per pass and more time for the complete rendering. Initially, ArielVision is set to use a medium resolution so you can preview your model quickly and increase the resolution later if desired.
ArielVision defines material properties and rendering settings inside of SketchUp and saves them in you SketchUp model. One button click is all that is necessary to create and view the rendering.
There are additional settings for HDRi skies (360 degree images which enhance illumination and brightness information stored in the image), and for other background images.
Summary of Features
| ArielVision Features | |
|
|
How easy is it to render an amazing image with ArielVision?
Before
After

Key Features
Auto Reflection
Quickly create Auto Reflection for materials by using words like metal or plastic in a material name, and leave setting up the material properties for those styles to the software.
1-Click Rendering
Our Green Button 1-click rendering is all that many users need. Handy interior, exterior, HDRi, and studio presets enable you to quickly select an appropriate light setting for your scene.
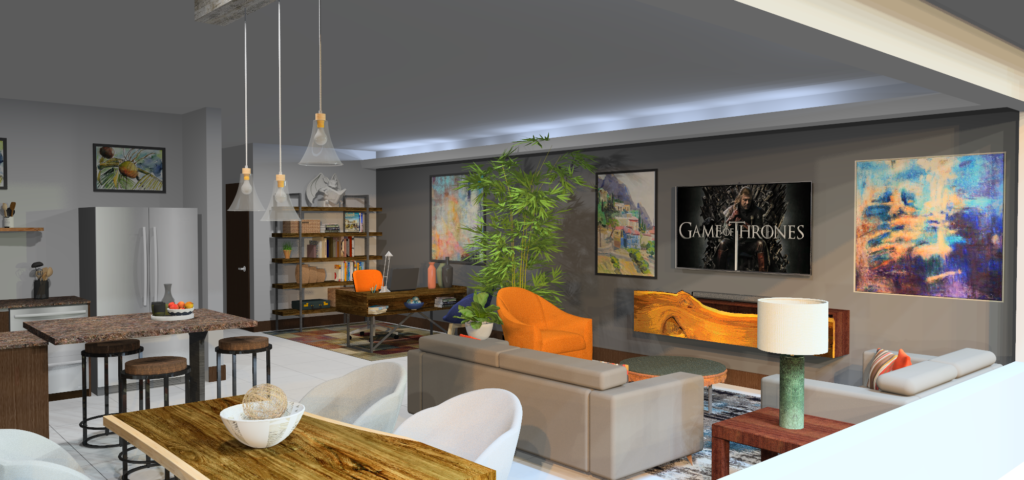
Image Size and Resolution
Render to whatever resolution you decide, or choose from the presets provided, including options for the most popular social media platforms.
Render Ready Lights
Pick and place from our library of Render Ready lights. Or quickly create and customize your own ceiling, floor, table, point, spot or tube lights.
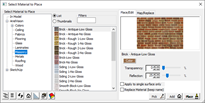
Materials
Material selection, editing, and placement is simple! Or create and name your own materials applying transparency, reflection and or texture as needed.
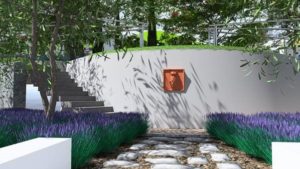
Create 2D/3D Plants
Choose from over 500 plants in our plant library or create your own. Render plants as 2D images or full 3D Fractal plants. Set plants to automatically change appearance to match the seasons making it easy show clients what landscaping will look like throughout the year.
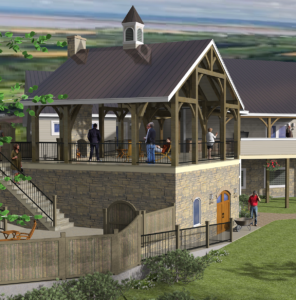
Showcase
All purchases include our world-class tech support!
Detailed Feature List
Create your model with SketchUp, then render it with IRender nXt. Easy to learn and use, you’ll be up and running in no time. There’s a full range of features that you will discover as you gain experience and want to extend your rendering skill. Some of the key properties in creating great renderings is lighting, shadows, and reflections. We make this easy through one click material presets, drop in lighting, and you can even adjust the lighting without rendering the model again.
- Compatible with all released versions of SketchUp
- Simple to add materials library and one-click presets
- Lighting components to just drop in and render
- Multiple lighting channels – even adjust color and brightness after rendering is complete
- Support HDR images for simple realistic lighting and backgrounds
- Render amazing images and panoramas
- Add or create 2D/3D Plants for realism and fast rendering
- Create animations with a simple setup wizard
Choose from 5,000 standard materials or create your own. The Materials Wizard provides multiple controls for a single material, including transparency, index of refraction for glass materials, and more. Use bump maps to give a material (with or without textures) a different appearance.
 Auto Reflections to SketchUp materials – You can select auto reflections to automatically add reflection settings to SketchUp materials; you can even easily customize
- Material Wizard
- Quick Presets – plastic, mirror, glass, water, etc
- Advanced materials properties if you need them
- Advanced reflections – mirrors, glass, hardwood floors, etc
- Realistic textures with bump maps to create realistic bricks, blocks, roofs, water, and more
- Water materials from smooth to rough and shallow to deep
- Grass and texture wizard
 Auto Reflections to SketchUp materials – You can select auto reflections to automatically add reflection settings to SketchUp materials; you can even easily customize
Lighting in 3D rendering can make all of the difference in creating realist renderings. This is why we focus a realist lighting anyone can create. You can use our drag and drop lights, lighting presets, or quickly make your own custom lights.
 Drag and drop, render ready interior and exterior lights, which are ready for you to set brightness, color, and lighting channel
- Ceiling light to lamps light wizard to walk you through light creation
- Lighting rendering presets for studio, interior, exterior and more
- HDR images provide quick drop in high quality lighting setup and background scenes
- Stop re-rendering for lighting changes! Our rendering software allows you to change lighting color, intensity, and even on or off for quick changes after rendering.
 Drag and drop, render ready interior and exterior lights, which are ready for you to set brightness, color, and lighting channel
In addition to stunning, high quality rendered stills, IRender nXt also provides tools to render panoramas and animations. While your clients will love your renderings, watch their faces when you show them an animated walk-through or panorama.
- Animations – Create a high-quality animation of a SketchUp model with IRender nXt! Quickly setup your animation by creating the scenes to be included, define frames per second and image size, then render the resulting frames. Once frame rendering is complete you can simply create the movie!
- Panoramas – Create a full 360 degree panoramic image which can be turned into a movie and embedded in a web page. A panoramic image is created by rotating the camera while rendering to create a full 360 x 360 degree image. Panoramas work best with large interiors, or with exteriors which have a central point which lets you view the full model.
The IRender nXt Image Editor enables you to easily make changes to an image after rendering is complete without having to re-render or use third party software.
 Use the tools available via the Image Editor toolbar:
- Lighting Channels – Adjust the effect of sun, sky or groups of lights.
- Lighting Adjustments – Control image contrast, burn, color saturation and brightness.
- Material Channels – Adjust the color or luminance of pixels rendered.
- Image Filters – Choose from a range of filters to apply a dramatic new look.
- Haze and Fog – Apply Real Time Haze or fog.
- Depth Blur – Adjust the near or far focus of your image.