|

IRender nXt Toolbar in SketchUp
|
|
This means that the IRender settings are stored in the SketchUp model, so you do not have to make changes if you reload the model, or for subsequent renderings of the same model.
Rendering settings and rendering functions are all available from a SketchUp toolbar.
|
|
|
|
|
|
|
The Presets lets you choose predefined settings for the most common lighting situations.
There are a lot of settings to create special lighting effects. The presets make it easier to get a good rendering without having to make all the setting manually.
Standard Presets
|
|
|
|
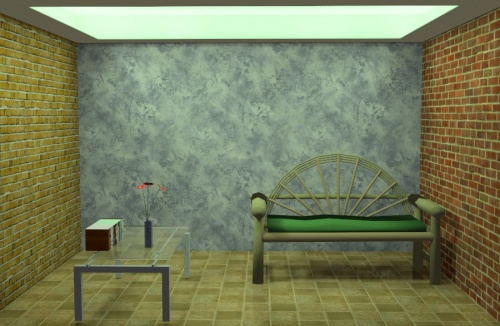
Incorporate the effects of reflected light, such as the reflected cove lighting above this suspended ceiling.
|
|
Indirect Lighting refers to the IRender nXt feature of processing light reflected from mirrors and other surfaces.
This creates a realistic lighting effect which improves with each successive rendering pass. Indirect should be used with most interiors scenes to soften the lighting effects.
|
|
|
|
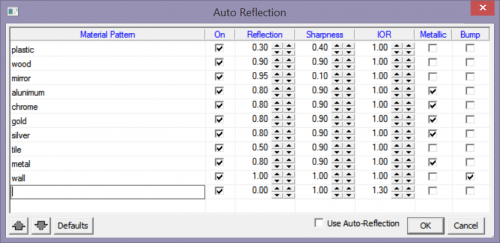
Auto Reflection wizard
|
|
Auto Reflection makes materials reflective by using a matching word pattern method in the material name. The reflection values for intensity, sharpness, index of refraction, and bump are preset, so reflection values for materials do not have to be individually set.
For example, you can specify that all material names that match the pattern "steel" will be 90% reflective and metallic.
Any assigned materials with names that match the list of patterns, and for which you have not already set specific reflection values, will render with the preset reflection values from Auto Reflection.
(If you do set reflection values for an assigned material, your settings will override the Auto Material settings.)
|
|
|
|
Go to Top

Solid wood material sculpted surface
|
|
There are more than 5,000 materials in the nXt Material library.
You can select any material from the library and place it on a SketchUp face to create a similar SketchUp material.
In many cases the SketchUp material is an approximation of the full fractal material which will be created when you render the model.
Download the Libraries and install them on your computer.
|
|
|
|

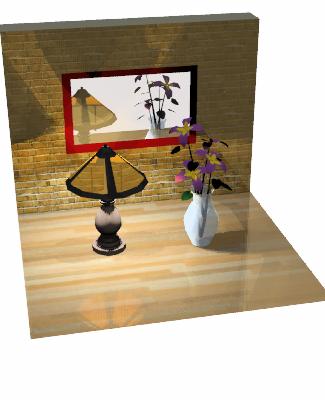
SketchUp materials are automatically rendered with colors, textures and transparency.
|
|
SketchUp materials are automatically rendered as materials in IRender nXt.
You can set reflection and other rendering properties by right clicking on a face containing a materiel to set its rendering properties.
|
|
|
|
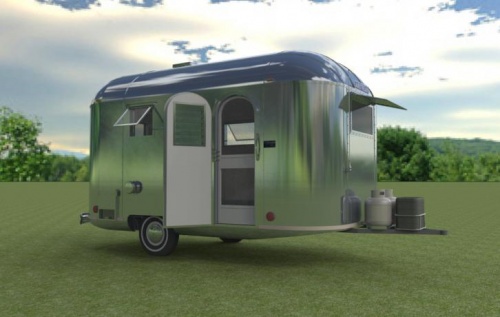
IRender Ready content in 3D Warehouse
|
|
Our special collection in the Trimble SketchUp 3D Warehouse includes lights, mirrors and other components that are ready for use with IRender.
Lighting, Reflection and other render settings are already stored in the the components, making these components IRender Ready.
|
|
|
|
Go to Top
Transparency settings in Material Wizard
|
|
Sets multiple settings for a single material - such a setting both transparency and index of refraction for glass materials.
|
|
|
|
Add mirrors and glossy surfaces
|
|
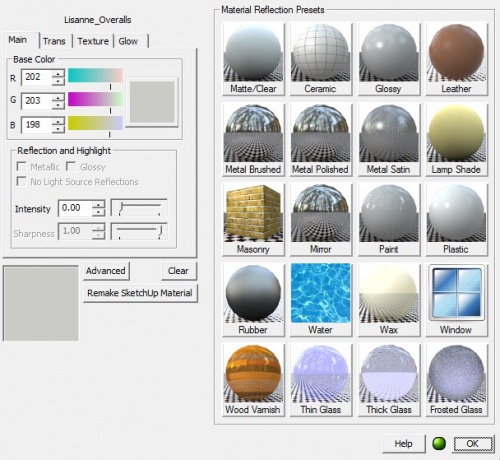
Make any SketchUp material reflective with a simple right click edit.
You can start with a default Reflective Material and use a slider bar to change the amount of reflection.
You can also add other special features - such as Sharpness/(blurriness), glossiness or metallic reflection.
|
|
|
|
Set reflection and other material settings
|
|
Applies reflection and transparency directly to SketchUp materials. Changes are made easily with a slider bar.
IRender nXt sets multiple settings for a single material - such a setting both transparency and index of refraction for glass materials.
|
|
|
|
Go to Top
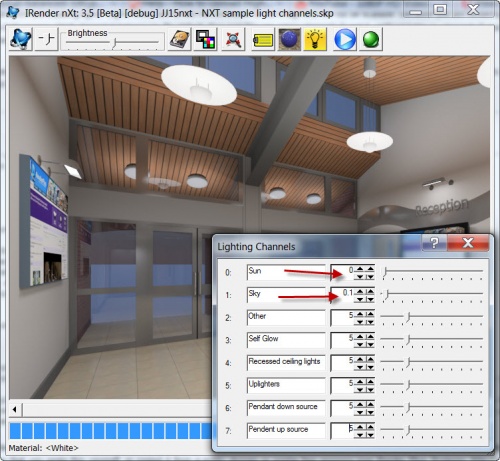
using the Light Balancer.
|
|
the Light Balancer is an important new feature of IRender nXt which lets you quickly adjust light sources.
By assigning channels to sun, sky, and groups of lights, you can quickly adjust the intensity of each channel with a slidebar and immediately see the effect on the final rendering.
You can quickly adjust the intensity of each channel with a slide bar and immediately see the effect on the final rendering. This will saves time both in determining the relative intensities to use for light sources and in fine tuning the final image before publication.
Videos and Tutorials
|
|
|
|
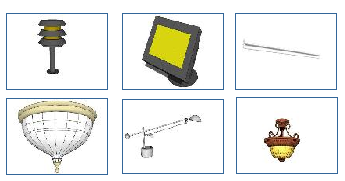
Spotlight component - generated at proper size and angle.
|
|
Adding lamps and light fixtures will provide lighting for your Interior Scenes or Nighttime Scenes.
- SketchUp lamps - many SketchUp lamps are automatically used as light sources.
|
|
|
|

Television with 10% self-glow
|
|
Self Glow illuminates a surface as if it had light shining on it, without actually making it a light.
For objects which you want to appear bright, but which don't need to illuminate other objects, this is much faster than making lights out of them.
|
|
|
|
Go to Top
HDRi skies for background, illumination and/or reflection
|
|
HDRi Skies are special images to represent skies which contain extra information about intensities of the colors.
HDRi (high dynamic range imaging)is a set of techniques that allows a greater dynamic range of exposures (the range of values between light and dark areas) than normal digital imaging techniques. The intention of HDRi is to accurately represent the wide range of intensity levels found in real scenes ranging from direct sunlight to shadows.
IRender nXt offers support for HDRi Skies - used as visible skies, as sky reflections and for illumination from the Sky.
|
|
|
|
Go to Top
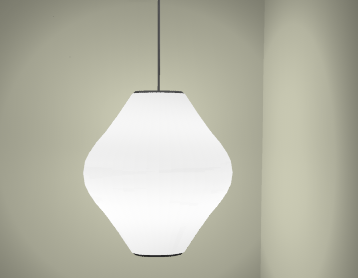
Translucent lamp shade
|
|
Translucency is the ability for light to pass through a material that is not transparent.
|
|
|
|
SketchUp transparency selected for entire model
|
|
IRender nXt automatically uses SketchUp transparency settings.
It includes refraction, reflection and illumination through the transparent surface.
You can edit the transparency settings with a slider-bar, change the
Index of Refraction
, or add other special effects such as
Translucency
and
Caustics
|
|
|
|
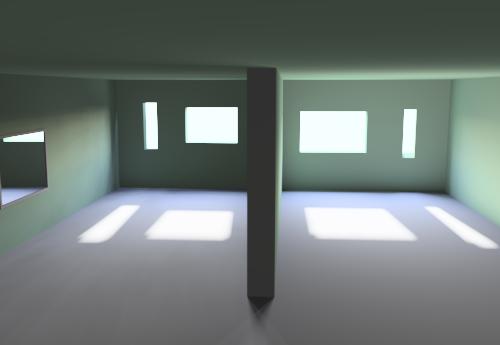
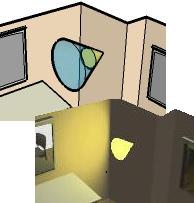
Daylight effect through windows.
|
|
a special transparent face placed over an exterior opening or window which causes exterior light to be processed better.
The left half image on the left has a normal (non-Daylight Portal) opening. It took hundreds of passes to resolve properly. The right half has openings marked as Daylight Portals. The lighting looked this good after just a few passes.
|
|
|
|
Go to Top
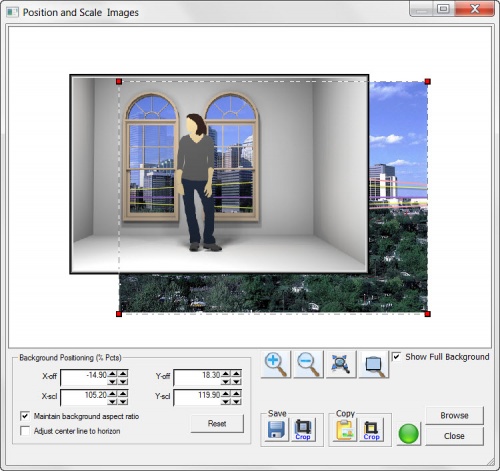
Positioning and sizing images with the Image Layer Wizard
|
|
The Image Layer Wizard makes it easy to scale and position foreground and background images with your rendering.
Watch the Video:
HDRi Positioning Video
How to use it
- Download the latest version of IRender nXt
- Select Position/Preview from the Background Setup Tab.
|
|
|
|
Light Balancer in Post Processing Wizard
|
|
IRender nXt
includes several post processing features to make changes to your rendered image without the need of using other third party software.
These are all combined into the
Post Processing
Wizard.
See:
Post Processing
|
|
|
|
Go to Top
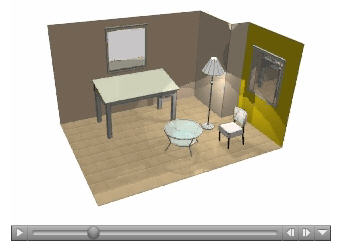
Animation movie.
|
|
Animation or your IRender nXt image is created by rendering scenes, moving the camera, and rendering the next frame.
|
|
|
|

Image courtesy Mike Halls
|
|
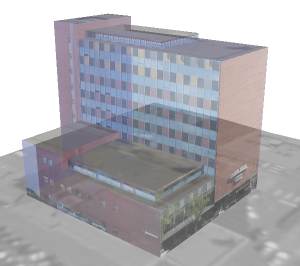
With IRender nXt you can render a high-quality, high-resolution image suitable for creating posters, etc.
Very high resolutions will require more RAM, and a 64-bit processor.
|
|
|
|

Two Point Perspective in SketchUp
|
|
Keep vertical lines parallel while panning the view.
Perspective views set in SketchUp are rendered properly in IRender nXt - This makes your exterior view more realistic.
|
|
|
|
Go to Top

Visible Light Paths
|
|
View spot light beams as if shining in a hazy room.
This feature creates a transparent lamp beam with a pattern to emulate light passing through a smoky or foggy room.
You can define a visible light beam on the spot-light creation wizard.
|
|
|
|
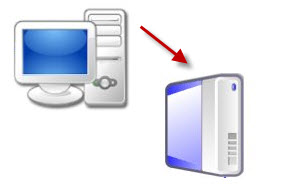
Render on another CPU
|
|
External Rendering exports the model to a file, and then renders the file in a separate process.
This allows you to make changes to the SketchUp model wihtout having to wait for the rendering to complete
|
|
|
|
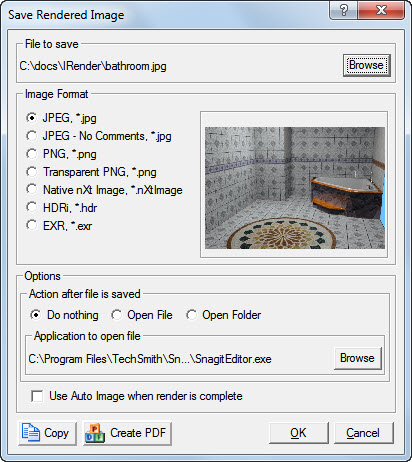
Create 3D PDF
|
|
Create PDF is a feature to create an interactive 3D PDF Presentation using your model and your Rendered Image.
Both the 3D Model and the Rendered Image are displayed on the first page of the PDF file, with a set of buttons for the user to choose between the two.
How to use it
- Render your model, and use the Save Image icon on the toolbar to load the Save Image Wizard.

- Select Create PDF from the bottom of the Wizard.
- Enter the PDF settings on the next dialog.
|
|
|
|
Go to Top

Get a free Laptop Seat with {{{product}}}.
|
|
An additional license for your laptop is included with {{{product}}} at no additional charge.
|
|
|
|
Go to Top
|
- Download the IRender nXt Free Trial
IRender nXt Features
Getting Started Videos
Getting Started
See All Videos]
|