IRender Tutorial - Rendering an existing model
This IRender Tutorial explains how to make some simple changes to an existing model to render it with IRender nXt .
Contents
Original Model
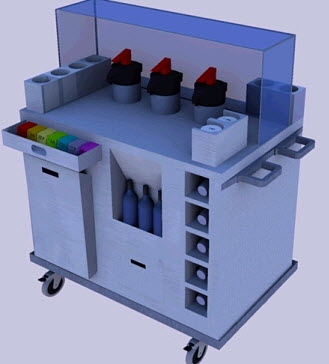
Original rendering submitted by user
This model was created by a user, www.servadei.com who wanted to see what could be done with it in IRender nXt.
The user sent a sample rendering of the model which was pretty blue.
(It turned out that the model had been rendered with another rendering product - and not IRender nXt.)

Original model in SketchUp
First rendering with default settings
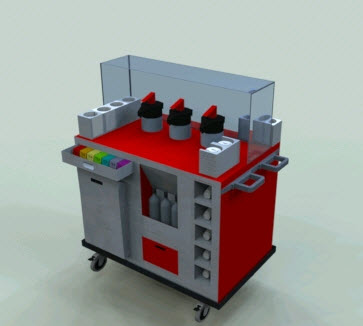
IRender nXt rendering with default High Dynamic lighting settings.
This is the basic rendering, without changing anything - (except that I turned the ground plane on to receive some shadow effects), or making any settings, using the default High Dynamic lighting.
Second rendering - reflection and transparency
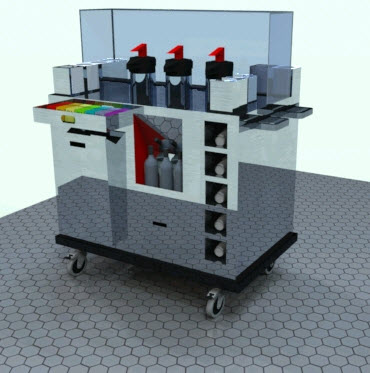
Model with face problems corrected and reflective material added.
Face problems
The red panels had a red color on one side. I changed it to the default color, so it would pick up the aluminum.
IRender nXt can only render one material per face. Sometimes you have to reverse faces, or set materials properly to render exiting models.
If you want a surface to have different colors on each side with IRender nXt, you will have to create a surface with thickness and put different colors on the two faces.
Reflective materials
I took all materials in with a an thing metallic in the name and used the material editor so set them as reflective metal
Glass settings
Because the glass canopy was drawn with a single face per piece of glass, (no thickness), I had to use Object Properties to mark it as thin glass. This will cut down on the distortion of objects seen through the glass you see in the image above.
Other changes
I also noticed that the model was floating above the ground, so I moved it down a little.
I put a reflective floor below the trolley to give the metal panels something to reflect.
I wasn't sure how reflective the trolley should be. You can raise or lower the reflection on materials as needed.
Third rendering - adding edge lines
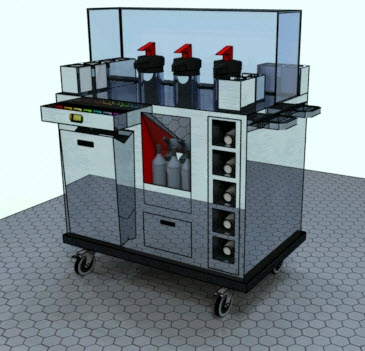
Model with edge lines added
For this next image, I turned on edge rendering because much of the details (e.g. door fronts) is lost without edge display.
Because SketchUp displays edges by default, we often draw detail with edges, where modelers using other programs would have to have changes in the geometry to represent the edges. (Note: as far as I am aware, IRender nXt is the only add-on render for SketchUp which processes edges)
- See: [[#Rendering with edge lines|How to: Rendering with edge lines]
Fourth rendering - using artificial lights
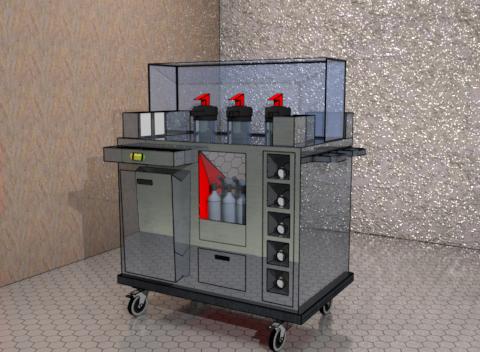
A next step would be to add additional lighting, backgrounds, etc. to highlight the model.
I added a walls, a ceiling, ceiling lights and a spot light shining on the model from the front.
- See: [#Adding ceiling lights|How To: Adding ceiling lights]]
Once you start adding lights, especially to highlight a single object like this, things can get complex.
You find yourself adding, moving and adjusting lights to try to get the effect you want. Often, it is best to simplify the model while working in lighting - by turning off layers when possible - because you will find you want to render, and re-render, as you make lighting changes. Also, set the number of passes low (about 5), and/or stop the rendering early, because you can often see the effects of the lighting with just a few passes.
For instance, here I turned the edge lines off while working on the lighting, since the rendering extracts and renders about twice as fast with edge lines turned off. (We have to create several faces per edge to render with edge lines.) I turned them back on for the final rendering on the right.
Often the default, High Dynamic lighting model is best for creating renderings of individual objects.
How to guide for model changes
Setting Ground Plane
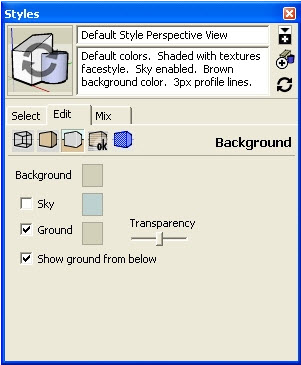
SketchUp Styles Window
- The Ground Plane Settings for SketchUp are on the SketchUp Style window. It is actually kind of hard to get to because you have to click the model icon, click edit, and then select the proper tab.
- In IRender nXt we placed the SketchUp Sun, Sky and Ground on/off buttons on the Presets window. (See the image in the next question about High Dynamic Lighting)
- (We use the SketchUp Sun, Sky and Ground Plane settings. But it is often easier to set them on the IRender nXt Setup Wizard, then to find them in SketchUp.)
Selecting High Dynamic Lighting
- When you load IRender nXt and start it, you get a setup icon on the toolbar which loads a tabbed setup dialog.
- The lighting presets are on the first tab.
- These 4 preset can be very helpful in setting up different types of renderings.
- After you select a preset, you can modify most of the individual settings on the dialog below.)
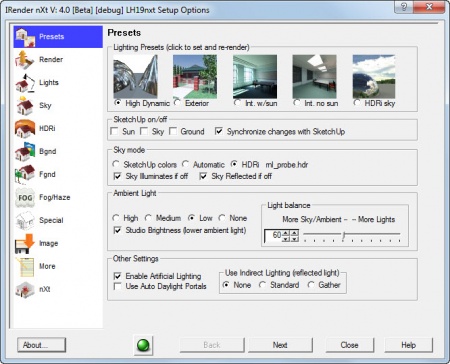
Lighting Presets in IRender nXt
Setting material properties by material name
- IRender nXt lets you change the reflection for a material by name, so you do not have to do it face by face and you no not have to enter into materials to make them reflective.
- You can choose preset default material types, and then adjust the individual controls.
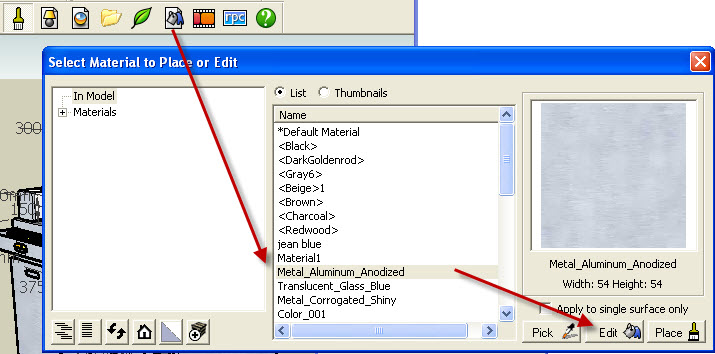
IRender nXt Material Selection and Placement Wizard
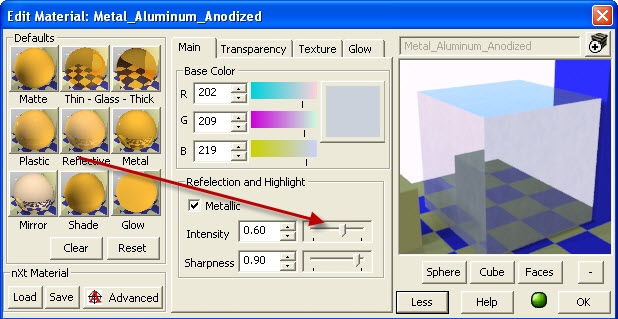
IRender nXt Material Wizard to use reflective or metal defaults
Setting Object Properties
- When you right click on a material, you can load the object properties dialog in IRender nXt
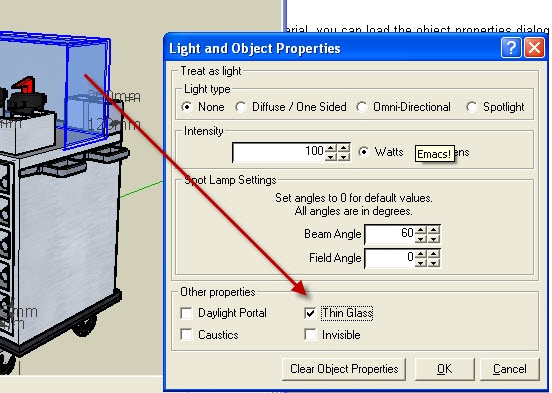
Light and Object Properties. Can be set for a face, surface, group or component.
- Here I set the "thin" property for the entire component by right clicking on the component.
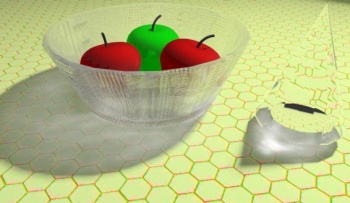
Thick glass rendered with Caustic Transparency effect.
- Also, for thick glass, you can make thick glass (two faces for panes, all faces for other objects)in SketchUp and get some realistic effects.
Rendering with edge lines
- Edge Settings are on the Special Tab of the IRender nXt Setup Wizard.
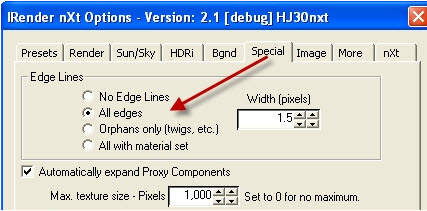
Edge Settings in IRender nXt
Adding ceiling lights
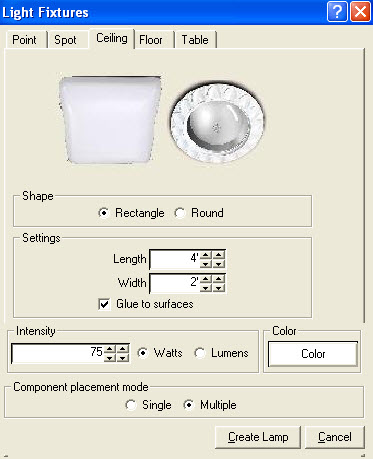
Ceiling Light Wizard
- Click the Create Light Fixture icon (
). The 'Light Fixtures' dialog will appear.
- Select the 'Ceiling' tab to create a ceiling lamp.
- Select type desired - rectangular or round.
- Set size and intensity of lamp
- Click 'Create Lamp' to create a component for the lamp.
- Place the component into SketchUp
